Stripe recommends using the new SCA compliant API going forward. So use the new SCA Compliant Buy Now Button Documentation to create new Stripe Buy Now buttons for membership.
The following documentation exists only for users who are still using the old API.
WordPress Simple Membership plugin allows you to create Stripe Buy Now buttons so you can accept membership payment via the Stripe payment gateway. Your users will be able to pay you using a credit card on your site.
Once you create the Stripe button in the plugin, you can add a shortcode to place the payment button on your membership “Join Us” page.
Creating Stripe Buy Now Button for Membership Payment
Step 1) Select Stripe Buy Now Button
Go to Payments -> Create New Button interface from the admin dashboard of this plugin. Then select the Stripe Buy Now option (see image below):

Step 2) Configure the Payment Button Details
Enter the payment details and select your membership level for the button. See example below:

Step 3) Configure the Stripe API Key Details
Enter your Stripe API Key details in the payment button also.
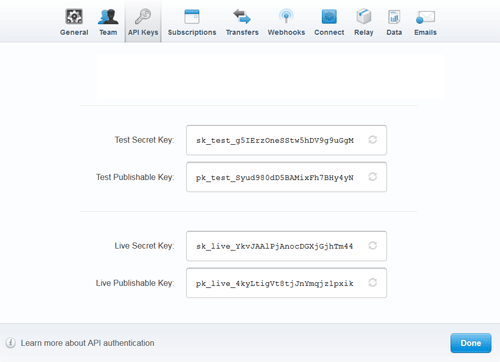
You can get Stripe API key details from your Stripe account. Go to the “Account Settings” menu after you log into your Stripe account. See screenshot below:
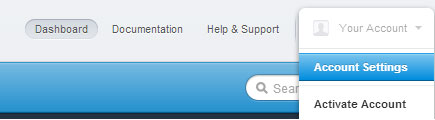
Then click on the “API Keys” tab which will show you the API keys.
Step 4) Save the Payment Button
Save the payment button after you have entered all the necessary details. This will create the payment button.
Step 5) Put the Payment Button on a Page
You can now put this newly created button on your membership join us page so the visitors can pay you using this button.
The “Manage Payment Buttons” tab shows you the shortcode you need to use to put your Stripe payment button on a page.

The shortcode will create a buy now button (for the membership level you specified). It should look something like the following (you can put any text around the button):

When your users click on the button, they will see a popup like the following screenshot. They will be able to enter the credit card details to complete the payment.

Customizing the Button Text
You can customize the button text by specifying the value in the shortcode using the “button_text” parameter. Below is an example shortcode that uses “Pay Now” as the payment button text:
[swpm_payment_button id=75 button_text="Pay Now"]
Custom Style for the Stripe Button
You can specify a custom CSS class for the button using the “class” parameter in the shortcode. Then you can define your own custom CSS for that class.
For example, The following shortcode will use the standard theme’s button style:
[swpm_payment_button id=75 button_text="Pay Now" class=""]
The following shortcode will add the “my-stripe-button” class to the button so you can target that class and customize the CSS.
[swpm_payment_button id=75 button_text="Pay Now" class="my-stripe-button"]
What Happens After the Payment?
If this is a payment made by a NEW member then the user will receive an email that contains a “special” link to complete the registration. Read the registration process overview documentation to learn more.
If the payment is made by an EXISTING member then the membership level (associated with this payment button) is applied to the existing member’s profile.
Note: The member must be logged into the site as a member for this plugin to recognize the user and treat him/her as an existing member.
SSL Certificate Requirement
Stripe payment gateway requires you to have SSL certification on your checkout page (the page where you put your payment button). So the URL of that page should have HTTPS (example: https://yourdomain.com/join-us-page).
If you are not already using an SSL certificate on your site then you should contact your hosting provider and request them to install it for you. This plugin is useful to force your payment page (where you have the Stripe payment button) to be loaded using HTTPS.
How Can I Test My Stripe Buy Now Button?
If you have entered both your test and live Stripe keys into the Stripe Payment button configuration fields, completing a test transaction is simple. Enabling the debug log is advised prior to testing to ensure if any steps fail, you can view what went wrong.
- Click on the WP Membership Settings menu. Ensure the Enable Sandbox Testing checkbox is marked. Save Changes.
- Ensure within the Manage Payment Button section, you have entered both your test and live API credentials for the payment button you wish to test. If you have not entered the correct API details, you can find your details within your Stripe account under the Developers section.
- Open the page/post where the button is present.
- Click the Buy Now button.
- Enter an email address (one that does not already appear in the users menu of your WordPress website). This is where the registration link will be sent to so ensure you use an account that you have access to.
- A test visa card number is: “4242 4242 4242 4242“. The month and year will need to be any date in the future and the CVC can be “123“.
- Click the Pay button to proceed with the test transaction. You will not be charged anything as this is only a test card that you are using.
- If everything has worked successfully, you will receive an email to your address to complete the next stage of registration.
- Ensure you can sign up as a member and view member related content for that level.

After testing, you can uncheck the sandbox testing option in the settings to go live (if everything worked fine).