Stripe subscription payments require webhooks to receive notifications of recurring charges and other subscription-related events. If you are creating Stripe subscription buttons, you will need to create a webhook in your Stripe account. This documentation outlines the steps to do that.
Note: You only need to create the webhook once. If you have previously followed these instructions, verify that the webhook is still present in your Stripe account and proceed to the next step.
Table of Contents
Steps to Create a Stripe Webhook
1. Go to the Stripe Webhooks Menu
Log into your Stripe.com account. Then navigate to the Webhooks menu under the Developers section.
Click the Add destination link to create a new webhook. This will open the “Configure your event destination” page.
2. Select Events
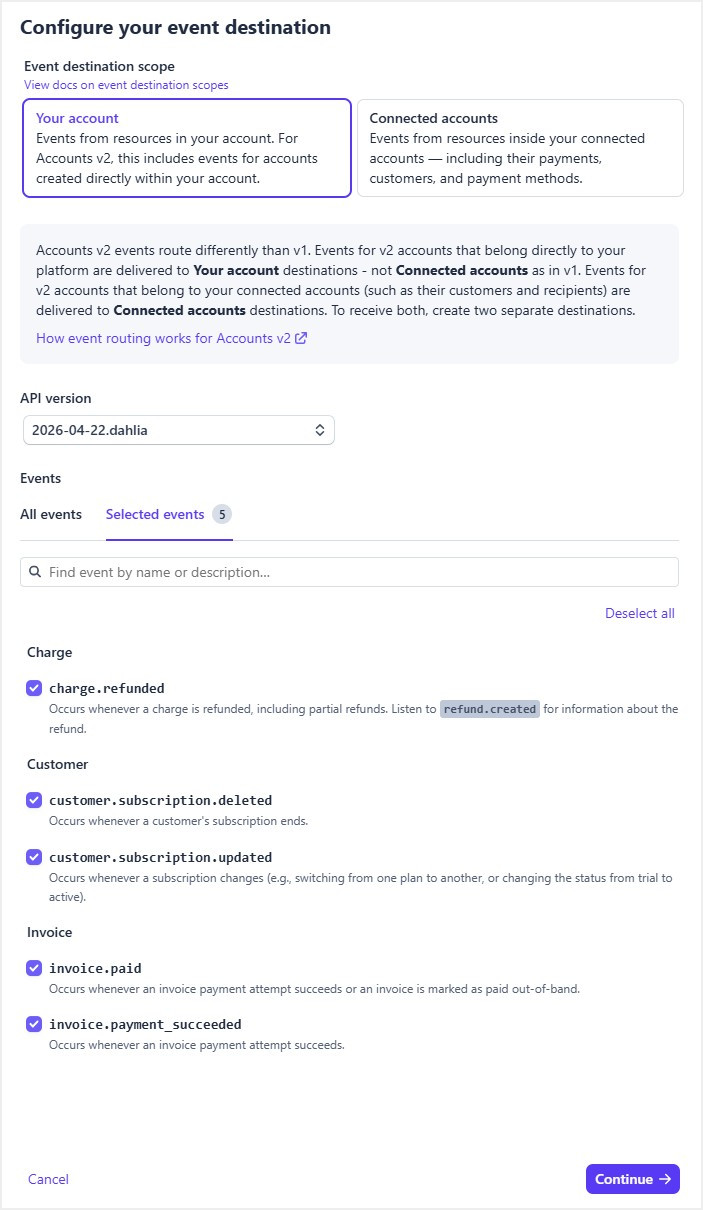
On the event selection screen, configure the following options:
- Account: Your account
- API version: The latest API version
Next, from the Events section, search for and select the following events by checking the checkbox next to each one:
- charge.refunded
- customer.subscription.updated
- customer.subscription.deleted
- invoice.paid
- invoice.payment_succeeded
As you check each event, it will be added to the Selected events tab. Once all 5 events are selected, click Continue.
3. Choose the Destination Type
Select Webhook endpoint as the destination type, then click Continue.
4. Configure Your Destination
You will need to copy the webhook endpoint URL from the Simple Membership plugin’s settings and paste it into Stripe’s Endpoint URL field.
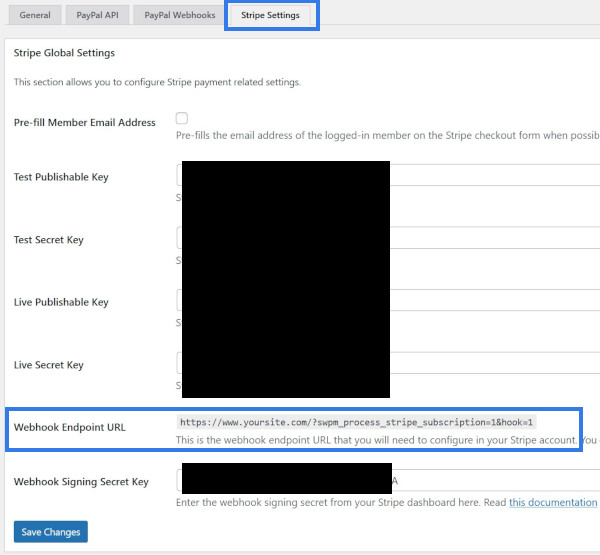
In a new browser tab, go to the admin dashboard of your WordPress site. Navigate to the Payments menu in the Simple Membership plugin, then open the Payment Settings tab and click the Stripe Settings subtab.
Locate the Webhook Endpoint URL field. This shows the URL where Stripe should send events. Copy this value.
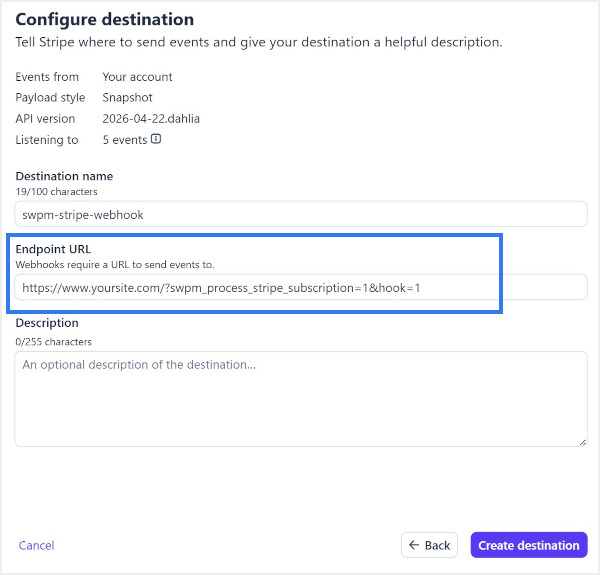
Switch back to the Stripe tab and paste the URL into the Endpoint URL field. You can also enter a descriptive name for the destination so you can easily identify it later (useful if you have multiple webhooks configured in your Stripe account).
Click the Create destination button to save the webhook.
Configure the Stripe Webhook Signing Secret
Now that the webhook is created, you should configure the webhook signing secret within the plugin. This adds an additional layer of security by allowing the plugin to verify that incoming webhook events genuinely came from Stripe.
Refer to the following documentation for instructions on configuring the webhook signing secret: