The WordPress Simple Membership Plugin allows you to create PayPal smart checkout buttons to collect membership payments. This method of payment button creation is very easy and can be achieved from the Simple Membership Payments menu. The PayPal smart button handles the checkout in a popup window.
There are a number of different payment buttons that you can create when using the Simple Membership Plugin. In this documentation we will take a look at how you can create a PayPal Smart Checkout Button to collect membership payments from your customers.
What is a PayPal Smart Checkout Button?
A PayPal Smart Checkout Button, is similar to a normal PayPal Checkout Button although allows for customization and dynamically changes to offer the customer the most suitable payment methods. This gives your buyers more ways to pay and in turn leads to a higher conversion rate.
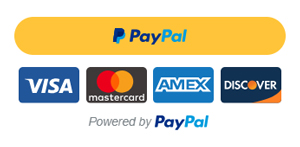
Also, the customer never leaves your site to make the payment as the checkout is handled in a popup window. The following screenshot shows an example of this:

The PayPal Smart Button Checkout contains a number of buttons that allow your customers to checkout using their PayPal Account, their credit card (Visa, Mastercard etc.) or PayPal credit. These buttons will change according to your customers location.
When implementing PayPal Smart Checkout Buttons the same membership registration process applies.
Locating API Credentials in PayPal Account
To enable the PayPal Smart Checkout for your membership site you will need to copy and paste your API credentials from your PayPal Developer Account.
Step 1) Log in to your PayPal Developer Account.
Step 2) Click on the My Apps & Credentials menu within your PayPal Developer Account.
Step 3) Scroll down and locate the Rest API Apps section.
Step 4) Click the Create App button.
Step 5) Give your app a name that relates to it’s intended use. For example, Simple Membership Smart Buttons.

Step 6) Click the Create App button. You will now see your Sandbox Client ID and your Sandbox Secret Key (once you click the ‘show’ button).
Step 7) Click on the Live button in the left hand corner to show your Live API Keys.

Step 8) Copy and paste both your Live and Test Client ID’s and your Live and Test Secret Keys from your PayPal Developer account into the WP Simple Membership Payments Page. Ensure you paste them in the correct fields for the Smart Button to work.

Creating a PayPal Smart Button for Membership Payment
Step 1) Click on the WP Membership, Payments menu.
Step 2) Click on the Create New Button tab and then choose the PayPal Smart Checkout option and then the Next button.

Step 3) Choose a Title for your payment button and select the Membership Level that this payment will be for.
Step 4) Enter a Payment Amount and choose the Correct Currency from the drop-down menu.

Step 5) Copy and paste your Live and Sandbox Client ID’s and Secret Keys from your PayPal account into the correct fields if you have not already done so. You can find out where these credentials are located in the section above.
Step 6) Customize the look of your Smart Button using the tools under the Button Appearance Settings. You can choose the Size, Color, Shape and Layout of your Smart Button.

Step 7) Under the Additional Settings section, you can choose to allow PayPal Credit and ELV payments by marking the appropriate checkbox.
PayPal Credit: Allows customers to purchase an item and pay PayPal back in installments.
ELV: A common method of payment in Germany. This payment involves a direct debit from the customers bank account with a third party payment gateway involved.

Step 8) Enter a Return URL if you wish to direct your customers to a specific page (thank you page) after a successful transaction.
Step 9) Click the Save Payment Data button to complete the Smart Button configuration.
Step 10) You can now use this button shortcode to offer this membership to your customers. This will be a smart checkout button.
Display of a PayPal Smart Checkout Button
You can now put this newly created button on your membership ‘Join Us’ page so the visitors can pay you using this button.
The “Manage Payment Buttons” tab shows you the shortcode you need to use to put your payment button on a page. Once you put your Smart Payment Button on a post or page it will look similar to the Smart Button below:

You can then add details above your button that explains your membership and the cost associated with the membership.
Example: PayPal Smart Payment Button on a Membership ‘Join Us’ Page

What Happens After a PayPal Smart Checkout Payment?
If this is a payment made by a NEW member then the user will receive an email that contains a “special” link to complete the registration. Read the registration process overview documentation to learn more.
If the payment is made by an EXISTING member then the membership level (associated with this payment button) is applied to the existing member’s profile.
Note: The member must be logged into the site as a member for this plugin to recognize the user and treat him/her as an existing member.