In this documentation, you will learn how to guide your users in creating a user account before proceeding to pay for a premium membership level.
Table of Contents
- Standard Registration vs. Account Creation Before Payment
- Overview of How this Registration Method Works
- How to Configure the ‘Register Prior to Payment’ Method
Standard Registration vs. Account Creation Before Payment
Standard Registration Process
The standard/basic membership registration process involves your customers paying for a specific membership level prior to receiving an email with a unique registration link. The unique registration link can also be configured to appear on the ‘Thank You’ page.
Once they receive the unique registration link, they can complete the required details to sign up for the membership level. After submitting the form, they gain access to the protected content they paid for. Refer to the Standard Membership Registration Process documentation to learn more on that.
Account Creation Before Payment
While most users of our Simple Membership plugin prefer the standard registration method, you also have the option to require visitors to create an account before making a payment.
In this process, customers first sign up for a free membership by providing their information before upgrading to a premium membership through payment.
Overview of How this Registration Method Works
The following infographic outlines the overall steps involved in the ‘Account Creation Before Payment’ registration method.

When using this method, the steps below outline the registration and payment process flow.
Note: Please note that the setup demonstrated here is merely an example created on my site. Your setup may vary slightly.
Step 1) Your website visitors will go to the Join Us page or another landing page that you have created to access the information you have provided about the membership(s) you offer.
Step 2) They decide that they would like to become a paid member of your site and follow the link that tells them to join. In this example, my customers will be clicking on the ‘Site Membership’ menu option. I just added this link to my navigation menu. Alternatively, you can add a link on your Join Us page.

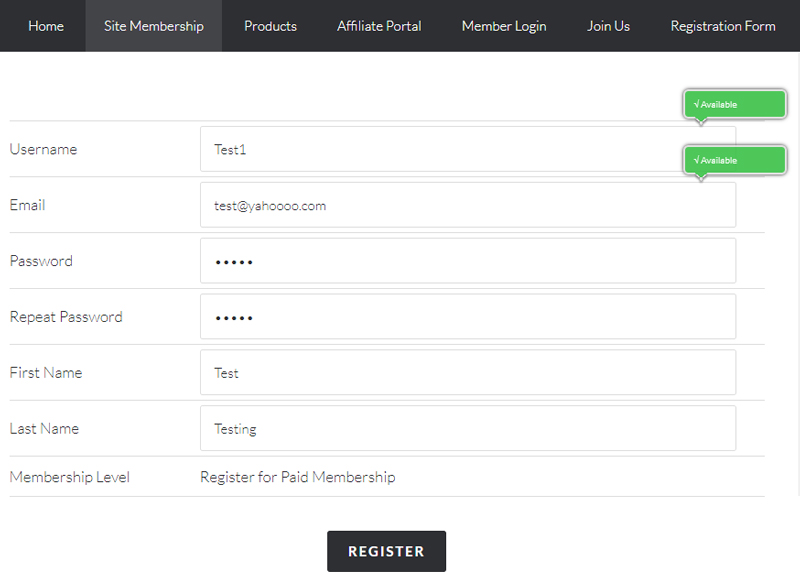
Step 3) This link then takes them to a registration form that they will complete (before paying for one of the paid membership levels).
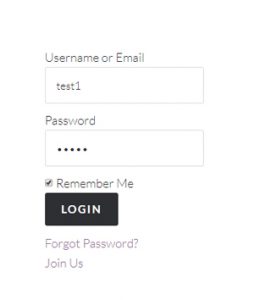
Step 4) After they have completed the registration form (which is for a free user account) they are prompted to login.
Step 5) Once they log into the site, they will see a payment button for the paid membership levels that you offer.

Step 6) They can pay for the paid membership level at this stage. After a successful transaction, the plugin is notified by the payment gateway and their membership account is upgraded from the free level to the paid level. Your customer will then have access to the paid content that they just paid for.
How to Configure the ‘Register Prior to Payment’ Method
To start, I will create a placeholder free membership level. This free level is intended to enable users to create an account or profile on the website. Once a user has created an account, they can log in and pay for a premium membership level. After payment, the plugin will automatically apply the paid level to their existing account without the need for the user to take any further action.
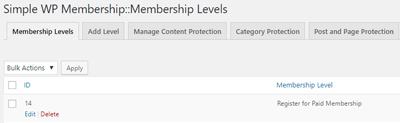
Step 1) Create a Free/Basic Membership Level
- Click on ‘Membership Levels’ under the ‘WP Membership’ plugin.
- Click the ‘Add Level’ tab.
- Give your level a name (Something like Basic Account)
- The WP role should be left as ‘Subscriber’ and the duration left as ‘No Expiry’.
- Click the ‘Add New Membership Level’ button.

Step 2) Create a Free Registration Form
- Copy the ID of the membership level that you created in step 1 (in this example my membership ID is ’14’).
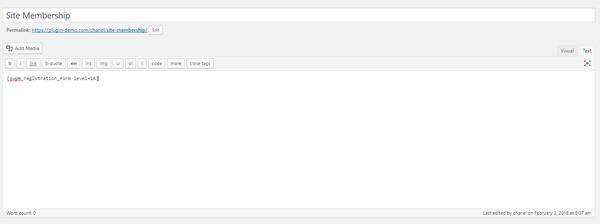
- Create a post/page and give it a title. This will be the page where your customers will come and register for a basic account.
- Enter the following shortcode on your page and replace ’14’ with your actual membership level ID:
[swpm_registration_form level=14]
Once you publish this page, you will have created a registration form where your customers can go to and enter in their details. You can then add this page to your websites menu or sidebar (the location of the link is completely up to you).
Step 3) Install and Activate the ‘Simple Membership After Login Redirection’ Addon
A free addon that allows you to configure after login redirection. We are going to use it to redirect the users of this free level to the payment page (so after they register and login, they get sent to the page containing the payment buttons)
Step 4) Apply After Login Redirection
Now that you have installed and activated the addon, an ‘After Login Redirection’ field will appear for each individual membership level.
- Copy the URL of the page where you have configured buttons for membership payment.
- Click on ‘Membership Levels’ under the ‘WP Membership’ plugin.
- Click the ‘Edit’ option for the free level you created in step 1.
- Paste the URL of your membership payment page in the ‘After Login Redirection’ field.
- Save the changes you have made.

After your customer completes their free registration and logs into their account, they will be automatically redirected to the page with payment buttons.
Step 5) Add Payment Buttons for Paid Levels
The Membership Payment section of our documentation has details on how you can create membership payment buttons.
Our plugin includes built-in payment options for PayPal and Stripe, allowing you to accept membership payments through either or both. Additionally, we offer integrations with various e-commerce plugins, which you can explore in the Membership Payment Options section of our documentation.
Choose any available option to create a membership payment button, then add it to your Payment/Join Us/Pricing page so users can pay for premium membership.